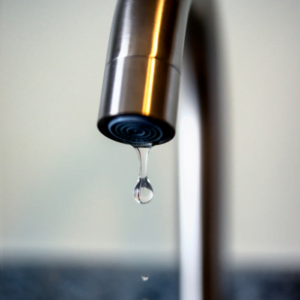
Hey there, DIY enthusiast! Are you tired of that annoying drip-drip sound from your faucet? Not only is a leaky faucet irritating, but it can also lead to unnecessary water wastage and higher bills. But don’t worry, you don’t need to be a plumbing pro to fix it. In this guide, I’ll walk you through a simple, step-by-step process to get that faucet working like new.
Understanding the Basics
First things first, let’s talk about what a faucet is. In simple terms, it’s a valve controlling the release of water. There are several types of faucets – compression, cartridge, ball, and disc – but for this guide, we’ll focus on the most common type in homes. You’ll need a few basic tools like a wrench, screwdriver, and possibly some replacement parts like an O-ring or washer.
Step-by-Step Guide:
Turn Off the Water Supply: Before you start, it’s crucial to turn off the water supply to your faucet. This is usually found under the sink. Turn the valve clockwise to shut it off.
Remove the Faucet Handle: Most handles are attached with a screw. Use your screwdriver to carefully remove it. If it’s a little tight, a gentle wiggle should do the trick.
Inspect the O-ring and Washer: The O-ring and washer are often the culprits behind a leak. Check them for wear and tear. If they look damaged, it’s time for them to go.
Replace the O-ring and Washer: Pop down to your local hardware store with the old ones to find perfect matches. Replace them carefully, ensuring they sit snugly where the old ones were.
Reassemble the Faucet: Once the new parts are in, reassemble the faucet in the reverse order you took it apart. Make sure everything is tight but don’t overdo it – these parts can be delicate.
Test the Faucet: Turn the water supply back on and give it a go. No more leaks? Congratulations, you’ve done it!
Troubleshooting Common Issues
If the faucet is still leaking, the issue might be a bit more complex. Double-check if everything is correctly assembled and the parts are the right fit. Sometimes, it’s just a matter of readjusting the components.
Preventive Measures and Regular Maintenance:
To avoid future leaks, regular maintenance is key. Check your faucets periodically and tighten any loose parts. Also, be gentle with your faucets – a lot of wear and tear comes from heavy-handed use.
When to Call a Professional:
If you’re still facing issues, it might be time to call in a pro. There’s no shame in it – some plumbing issues can be complex and require expert hands.
There you have it!
Fixing a leaky faucet is not as daunting as it seems. With a little patience and the right tools, you can do it yourself. Not only have you fixed the annoying drip, but you’re also saving water and money. Go you!
Tried fixing your faucet using this guide? We’d love to hear how it went! Reach out if you’re tackling more complex plumbing issues. Remember, there’s no job too big or small for a keen DIY-er like you!


